Fermentation Cabinet

Homebrew Talk - Beer, Wine, Mead, & Cider Brewing Discussion Forum

Help Support Homebrew Talk - Beer, Wine, Mead, & Cider Brewing Discussion Forum:

This site may earn a commission from merchant affiliate links, including eBay, Amazon, and others.

Choguy03

Well-Known Member
Joined
Apr 10, 2008
Messages
449
Reaction score
2
Location
Schaumburg
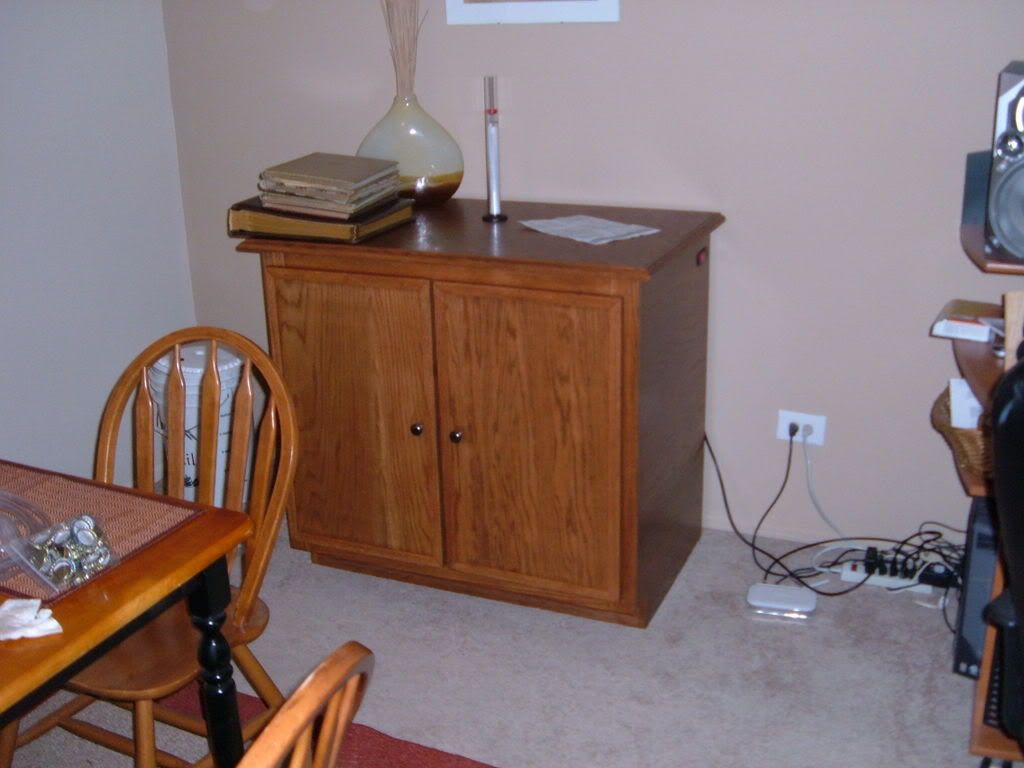
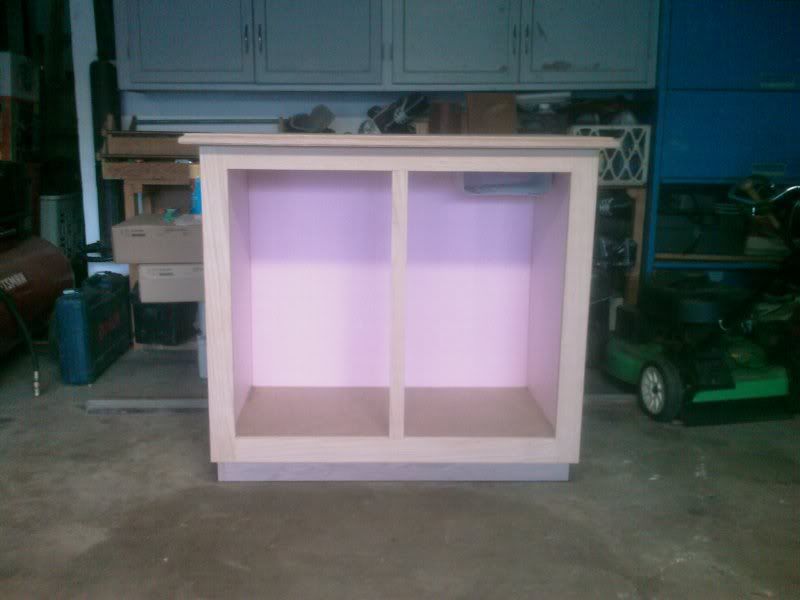
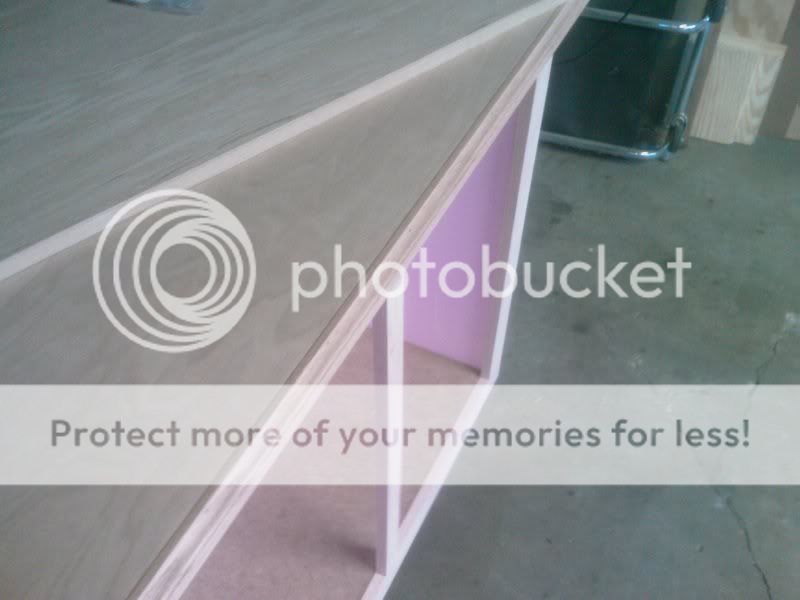
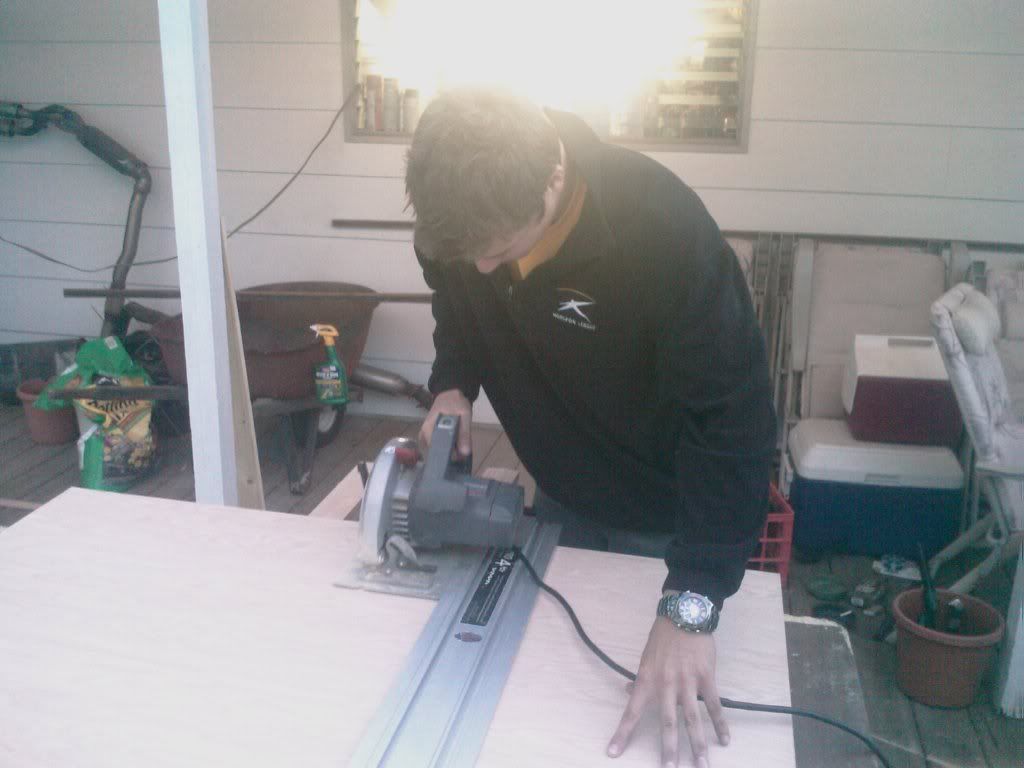
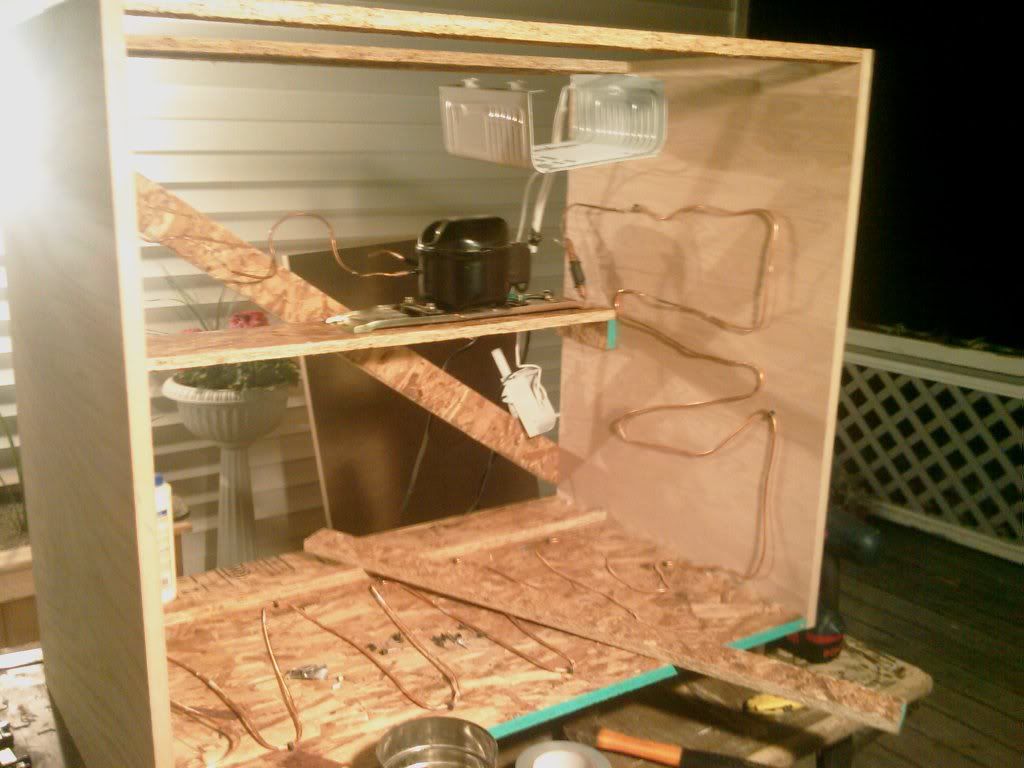
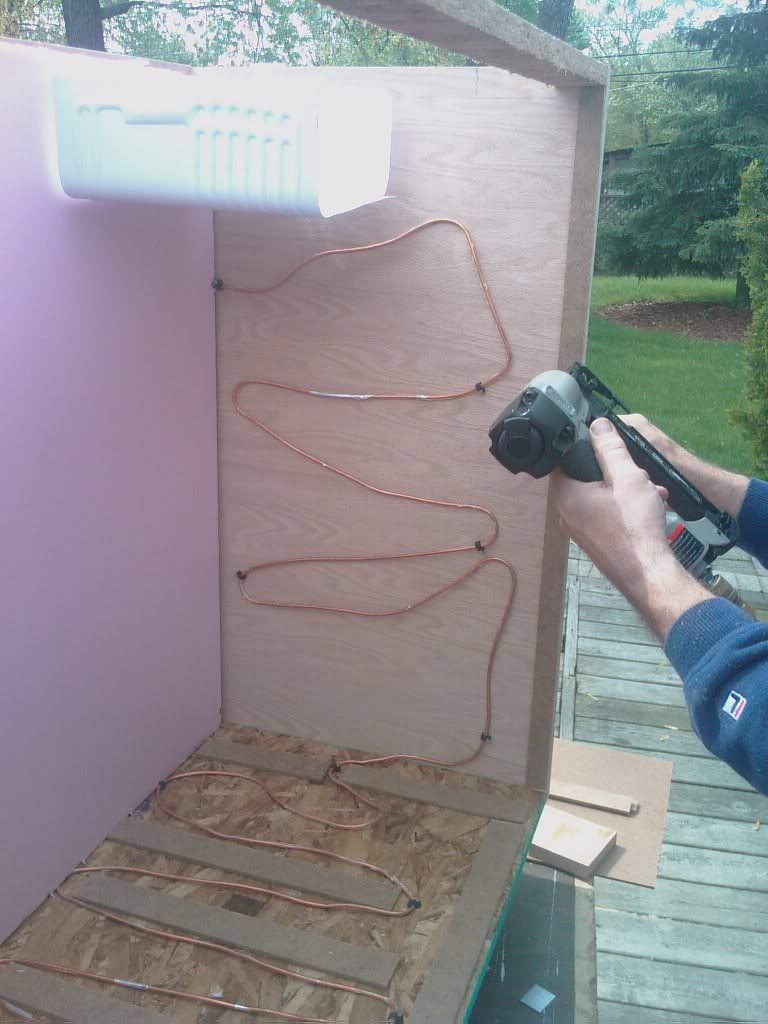
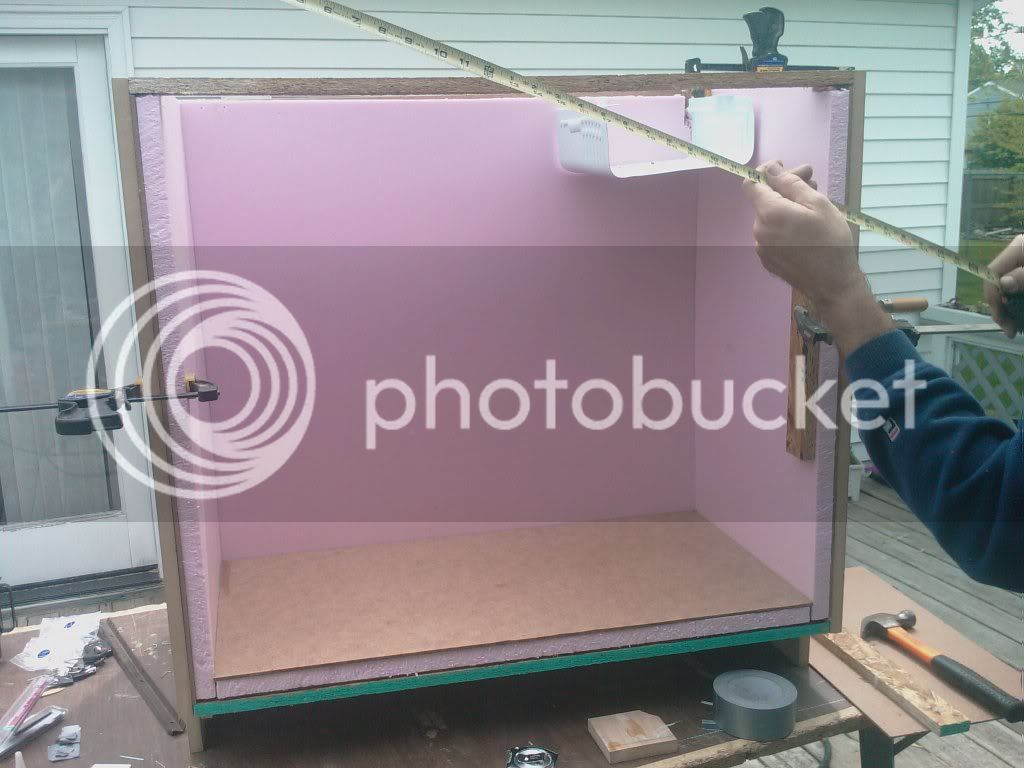
Well, here are a few pics from the almost finished product. I will be putting doors on this weekend. I used 3/4" oak mdf and then solid oak for the front. There is 1" foam board all around and there will be some on the door as well as some weather stripping to prevent any leaking.

IMAGE_071.jpg


IMAGE_070.jpg


IMAGE_069.jpg
 
Well, I went to HD and Menards to get a 1/4 sheet of oak MDF, but to no avail. I was pissed because I wanted to finish it this weekend. However, I did order a temp controller.


http://www.coleparmer.com/Catalog/product_view.asp?sku=9352000


It should be here today.


FYI: It is hard to tell from the pics, but I used an old dorm fridge (traded a printer for it) for the cooling system.
 
Well, I got the quarter sheet of oak plywood and the Love controller came in as well. I finished hanging the doors, but I still need to add the trim on the doors , wire the controller and stain the cabinet. Here are a few pics from earlier in the building. Hopefully the finished product will be done this weekend.

FermentationCabinet004.jpg


That is me using the Skill Saw.

FermentationCabinet008.jpg


FermentationCabinet011.jpg


That brad nailer is awesome. I can't remember the model number but you can get it for $70 shipped from Amazon. Shoots 5/8" to 2" brads.

FermentationCabinet014.jpg
 
Thanks. This project is going to end up costing me about the same as one of those Magic Chef freezers, but the SWMBO wouldn't want that sitting in the living room! :D
 
Looks good, but why the freezer tray? Won't that inhibit you from being able to put 2 carboys w/airlocks in it?
 
That's where the 'cold' is coming from, no?

Correct. The opening is 27 1/2" which is more then enough for my 6.5 glass carboy and the famous 'Ale Pail'. But I actually think I could fit two carboys. I think there is enough clearance.
 
Well, the cabinet is all finished. I just have to wire the controller up and stain. I am at work now, but will post pictures later tonight.
 
DSCF1378.jpg


Sweet Jesus, it took me a while but it is good to go now. See the love controller mounted into the side of the cabinet. Inside I have my Bee Cave Kolsch and will have the Haus Pale Ale in there tomorrow night. :mug: :tank:
 
Very nice. Excellent craftsmanship, particularly given that I see you used a skillsaw (vs. table saw) for your cuts. Any pics/tips on the refer disassembly? How's the oak working out for dissipating the heat from the hot side coil?
 
Very nice. Excellent craftsmanship, particularly given that I see you used a skillsaw (vs. table saw) for your cuts. Any pics/tips on the refer disassembly? How's the oak working out for dissipating the heat from the hot side coil?

I don't have any pics, sorry. But I will say that tin snips, utility knife and a thick pair of gloves are important. Just pick and open edge and start peeling back from the bottom or back. Be careful when pulling the sides away. The copper lines are taped to them and will break if you are not careful. The oak is working really well, very little heat at all.
 
Bummer on the pics, but thanks for sharing!

How's the oak working out for dissipating the heat from the hot side coil?

The oak is working really well, very little heat at all.

You mean very little heat on the inside, right? The outside should definitely be warm during operation.

What I'm getting at is this; Unless the cabinet is doing a really good job of casting off it's heat, the refer unit is expending a lot of it's capacity recycling it's own heat. Since wood is a very good insulator, I was concerned that the (beautiful) oak cabinet may be reducing your refer's efficiency quite a bit. That's one reason why deep freezers use a thin metal exterior shell. The condenser (hot) lines are just behind that shell and the exterior walls act as a heat sink. Here's a pair of pics to illustrate.

ref_comm.JPG


ref_home.JPG
 
That is what I figured you meant. The inside walls feel cool to the touch. I guess the wood is warmer then the inside (obviously). I used 1 " foam board and r value of 5. I know that you want to be able to cool those lines down, but setting the cabinet at 68 will give me 2-3 hours of load open per cycle. I think that is pretty good. The one thing I did notice is that during fermentation the heat produced caused it to cycle on about twice as much.

Nice pics by the way. :fro:
 
Nicely done! Love the Love controller built in. Good choice of beers too! :mug:

Now we need a pic with the doors open with the beers inside.
 
Now we need a pic with the doors open with the beers inside.

I will do that when I get home from work. Just moved the Kolsch to a secondary and I'm excited about this beer. Quick question: When you crash cool, do you cool in the fridge for a couple days then back to room temp, rack to bottling bucket and bottle?
 
I will do that when I get home from work. Just moved the Kolsch to a secondary and I'm excited about this beer. Quick question: When you crash cool, do you cool in the fridge for a couple days then back to room temp, rack to bottling bucket and bottle?

When I crash cool, I take it down to 30-37 degrees in the freezer where it ferments. This causes the yeast to flocculate down and the chilling tends to firm up the yeast cake so my beer is pretty clear when racked to the keg.

I do not let it warm up before racking.
 
Very nice. Looks like you have a leak on the right. Perhaps a tray would help.

Sweet piece of furniture!
 
Thanks. I am going to rig something up this weekend. Don't want to ruin all the work.

I used a piece of hardy board siding to put over the floor of mine so when/if there are any leaks or condensation it does not ruin any wood. Ive got a link in my sig.


Yours does look a hell of a lot better than mine though, I wish I had craftsmanship skills like that!!!:)
 
1 and 1/4 sheets 3/4" oak MDF
1 sheet 1' foam board
1/2 sheet 1/2 particle board (for the frame and base)
1/2 sheet melamine
10' if oak molding
10' oak trim for doors
2 door handles
1 dorm fridge
1/2 pint stain
1/2 pint clear coat
10' 1"x3" oak board
3' 1"x1.5" oak board
 
Is that MDF you used for the floor of that thing? Thats not wise since as soon as water touches it the mdf loses its rigidity. You should have used a piece of melamine. You should get something to remedy that right away.

Other than that - I think its a pretty handsome cabinet worthy of sitting in the living room! I make furniture... I can't believe I never thought of building something like this myself. That will be a nice winter project methinks!

cheers
Brr
 
There is particle board on the bottom then the one inch foam board with the melamine on top of that. I figured the MDF wouldn't bode well with water. I have rigged a pan under the cooling unit to catch any drops though. It was a fun project but just about the same as a freezer, but the SWMBO wouldn't want that in the living room. he he.
 
I was wondering how often this seems to cycle and how low of a temp. you can maintain. I am looking at building something like this in the near future but most threads I have seen use 2" insulation. I was also curious as to the size of the original minifridge. The one I have is about 4.5 cuft and I was thinking that it would be nice to possibly fit another carboy in there...
 
I was wondering how often this seems to cycle and how low of a temp. you can maintain. I am looking at building something like this in the near future but most threads I have seen use 2" insulation. I was also curious as to the size of the original minifridge. The one I have is about 4.5 cuft and I was thinking that it would be nice to possibly fit another carboy in there...

I cannot speak for the OP, but with my setup like this, I might hear it cycle once every 1.5- 2 hours or so if I have both chambers set at ~65 (ambient temps are usually ~78) I cannot get 2" insulation down here, so I glued 2 - 3/4" sheets together and built it like that. The size of the fridge should not matter, many of the fridges have the same size compressor whether it is a 1.5cu. ft or a 6 cu. ft fridge. Look for the BTU rating or Kw/year on the compressor. If I remember correctly, most small fridges are in the 320-360 range on Kw/year.
 

Latest posts

Back
Top