Cooling solution for casks - firkin, pin

Homebrew Talk - Beer, Wine, Mead, & Cider Brewing Discussion Forum

Help Support Homebrew Talk - Beer, Wine, Mead, & Cider Brewing Discussion Forum:

This site may earn a commission from merchant affiliate links, including eBay, Amazon, and others.

Gadjobrinus

Supporting Member
HBT Supporter
Joined
Aug 24, 2017
Messages
7,113
Reaction score
7,268
Location
USA
Hello all,

Unless and until I go down the CCF with jacket route, I believe I'm done gathering equipment (sure I am). I intend on spending more and more time in real ale; have restored my Angram engine, have both a firkin, pin, and breather setup (we'll see if I need it), just looking for a cooling solution.

I don't think we're talking about an insulation "coat" and cooling coil that drapes over the top; nor am I talking about the internal probe, same thing, recirc'ed icewater or glycol.

I'd like to gather your thoughts on the best refrigerator/mock cellar setup I can do. I'll be fermenting at 68, coming down to 50ish or so, condition there, cask and dry hop for service at 55F or so. The only cooling option I have right now is an undersized refrigerator-freezer. It works, but there like 1/8" clearance about the ball lock QDCs and I often have to pull the keg to deal with things, so not good. I am getting a couple 5 gallon cornies, and will be splitting batches between these cornies and pins, all in a firkin, all in a 1/2 bbl converted sankey with posts.

Anyway, sorry for that dissertation. Mainly for now, need a place to setup cask as much as a firkin for dispense off a beer engine (from time to time, gravity dispense as well). Just inviting as broad an idea base as possible. Many thanks, all.
 
Bump. May be boring, lol. Three things thinking - regulating air by a cellar downstairs, coolbot, etc. 2 door back bar beer cooler, depending on price; finally, Angram reminds me of a simple chiller setup, a flash chiller, with either a those external rib-looking things and an insulating blanket, or internal probe.

Any thoughts? Cooling is all that remains. Thanks.
 
Last edited:
I picked up an old "Cube" mini fridge with the faux woodgrain for $15. Removed the guts, and built a "cooler" to my specifications. Then I'm using BruControl (used to use my BCS-462) to keep it right at 50F.

You can generally find those old mini fridges really cheap, and then buy a 2" sheet of rigid foam to build your box to house your corney/firkin/pin!

:mug:
 
Some good ideas, thanks guys. Very unlikely to find it, but also intrigued by a recirculating cooler and a probe in the cask - small footprint, pretty nice, but can't imagine I'd find a mini flasher for anywhere doable. The back bar 2 door would be awesome and cyber, thanks, I've not thought of that for an internal idea. I have a mini-fridge doing nothing, so it's also a possibility.

Here's Angram's thing:

ultimate-home-bar-solution_0.jpg
 
A Cask Widge in a mini fridge would work well.
https://www.ukbrewing.com/category_s/69.htm

UK Brewing also offers a full Caskerator kit
https://www.ukbrewing.com/category_s/80.htm

Thanks Wayne. I've looked at vertical casking but to be honest I didn't think it was possible in a refrigerator, as the extractor sticks so far out above the cask. The other reason is just kind of dumb - I like the look of a traditional cask on its side, lol. On the caskerator, I was kind of blown away by the price - $2700! :eek:
 
I picked up an old "Cube" mini fridge with the faux woodgrain for $15. Removed the guts, and built a "cooler" to my specifications. Then I'm using BruControl (used to use my BCS-462) to keep it right at 50F.

You can generally find those old mini fridges really cheap, and then buy a 2" sheet of rigid foam to build your box to house your corney/firkin/pin!

:mug:

Hey cyber & all -

Coming up a bit torn between some methods.

1. Maxi chiller or similar, flash chiller type. I might have a good deal on a Maxi 110 chiller, which with a saddle/blanket system and python out to my water jacketed engine, will nicely cool everything. On the other hand people seem to be talking about these always as a "festival" or "outdoor" solution for an impermanent need, not sure it's because of their tendency to ice up fully and so are a pain for 24/7 use.

2. Double back bar or double beverage bar cooler. My first choice. Would hold one pin or firkin on line and one cask in waiting at perfect cellar temp; would cool beer lines and jacket with a pump and water reservoir in the fridge. No need to worry about anything icing up as everything is the same temp, 54-55F. Paul Pendyck's setup, of UK Brewing:


By far, this would be my preference. Downside is cost. I rarely see anything locally. There is one, $850, which I believe I'd be killed for even approaching my wife with, after everything else I've done (or intend to do, lol). That's the low end. Even used, I'm not finding back bar coolers less than $1200-1500.

3. Coolbot in the cellar. One idea, only problem is finding a means to run a beer line through 2 floors, and stay cool. Or, pour down in the cellar and bring up. But c'mon, man, I've a couple beautiful Angrams. I might as well gravity pour!:D

4. Coolbot upstairs, along your line, cyber. Not sure how I need to literally build out because I suck. Stick the a/c through some plywood, rigid insulation inside, galvanized sheeting, doors?

5. Your mini-fridge idea, which I like, Cyber. Be easy on me. When you say "guts," do you mean, just remove the "refrigeration" parts and discard the rest? Or remove all the "food" parts, all but the outer skin and cooling components left?

Do you happen to have any photos? Thanks, man.

Generally:

Cellar temp, 55F. Ideally enough room for 2 casks. Back bar cooler with, what, solar pump, water reservoir and lines feeding beer line and water jacket? Or Maxi chiller/external cooling, cooling cask with saddle/jacket and python.

On all the time, in our living room. So pleasant level of noise is an issue.

Thanks, all.
 
Sorry for the slow reply... unfortunately I cannot find any pics in my "gallery" here on hbt to share with you of my old set-up. To explain the "guts" comment more though...

The "brown wood grain" mini-fridges I mentioned are typically older and all of the coolant lines are external to the fridge. Some of them even have a very convenient opening for the freezer coil to slide out by simply unscrewing a phillips screw or two.

So on these fridges with exposed coolant lines, remove the freezer "plate" from the box of the fridge, and then unscrew the coolant lines and compressor from the mounts.

Build a box to the exact size specifications you want for your casks, insulate with 2" rigid foam, install the freezer plate somewhere internally and isolate the coolant coils externally. Voila. Much cheaper than buying that back bar cooler you linked in another of your posts.

That commercial cooler is very nice-- buy very large, and very pricey. You can build a custom cooler/cellar box to your exact size specs for under $100 easily.

I am actually redoing my whole brewery/bar area and will be building a new "cellar box" for my casks (holding 3-5 casks/kegs). If I make any progress, I will be sure to share pics with you.

:mug:

Wow, thanks for the great information, cyber. I actually have a throw away dorm fridge which I'll check and see just in case, but that is as clear an explanation as I could hope for. Really nice of you to take the time, and really appreciated. A virtual pint of the first strong bitter drawn, buddy.
 
Even if your dorm fridge does not have the coils exposed on the back of the fridge, it is still possible to use it-- it just requires more effort and also finesse! Basically you have to cut the metal skin off the "box" of the fridge, and then very carefully remove the lines from the foam insulation. If you kink the lines (and the copper they use is very soft for these "enclosed lines" dorm fridges) you let out all the refrigerant and you are out of luck, and back at square one.

That is why the dorm fridges with the external coils on the back are the best-- easy and highly unlikely to have a leak (although the one place it is possible to get a kink is the tube that runs into the freezer plate-- be careful with that one, because it is typically soft copper at that junction in all dorm fridges).

:mug:
 
Thanks Kevin. This one does have exposed coils, and the freezer plate. Thanks again for the help, this should be fun.

Er, em, this may be my stupidest idea yet. But I have a coolbot and a couple extra ac's. I've the thought, when I've had too much, to do something like this:

00u0u_5JyP9S3wnF5_600x450.jpg


-AC inserted L, Cask inserted inside, Engine mounted right. Or some such thing. Lame? I actually wondered if the AC would have the effect of drying out spiles, shives, etc., so that that might be a problem. Leave inside as is, or cover with rigid and maybe even some galvanized? Cellar consumables and tools below....

True test of inspired genius is if you still feel bright about your writing the next morning. So, you know....o_O
 
Even if your dorm fridge does not have the coils exposed on the back of the fridge, it is still possible to use it-- it just requires more effort and also finesse! Basically you have to cut the metal skin off the "box" of the fridge, and then very carefully remove the lines from the foam insulation. If you kink the lines (and the copper they use is very soft for these "enclosed lines" dorm fridges) you let out all the refrigerant and you are out of luck, and back at square one.

That is why the dorm fridges with the external coils on the back are the best-- easy and highly unlikely to have a leak (although the one place it is possible to get a kink is the tube that runs into the freezer plate-- be careful with that one, because it is typically soft copper at that junction in all dorm fridges).

:mug:

Hey Cyber, just wanted to ask you - and I'm sure this is a stupid question - but everything is disconnected but I don't know how to remove the freezer plate. Coils, everything is external on the back, there's a rigid, insulated line (copper?) going to the inside of the fridge, and 4 screws holding the plate to the ceiling of the fridge. Before I removed those, and risking kinking something, I thought I'd check in with you.

Also, I removed the top "skin" or "lid" off the fridge and have a field of what looks like insulation. Haven't done much here, though I did notice at least one screw, and I don't yet know what that's for. Is this a critical area, I should carefully remove the insulation to get to the guts?

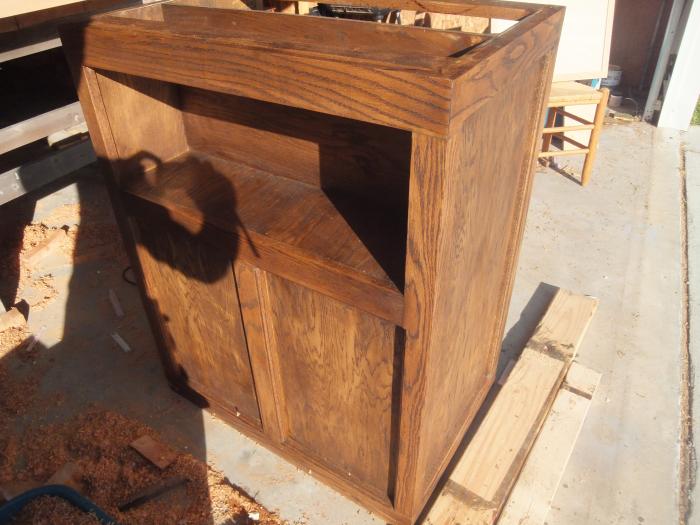
Finally, from this forum, wish I could remember whose this is, but it seemed pretty cool. To be honest, since we moved, we have no garage and my tools are limited anyway, so anything I could buy pre-fabbed and just tweak (adding in rigid foam, etc.) would be great. Anyway, what do you think, and what has he done? I see the plate up top but can't figure out what he's using as the cooling mechanism.

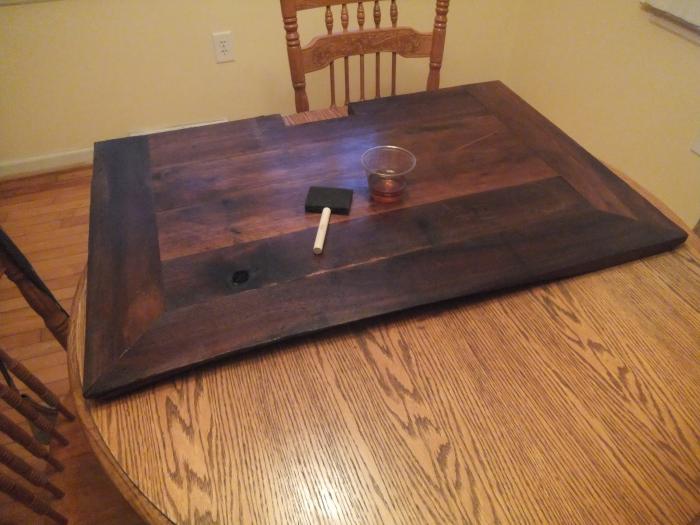
DIY CABINET TOP WALNUT.jpg
DIY CABINET 2.jpg
DIY CABINET.jpg
 
Paul,

The pics you linked look like he has done just as I described-- removed the cooling components from a small fridge and repurposed them into this cabinet.

That said, in your situation it sounds like you are almost there--- that copper line from outside your fridge is attached to the freezer plate. You need to create a hole somewhere in the fridge to free that copper line and the freezer plate. Since the top skin is off, cutting through the foam is probably easiest to remove the plate. But you will need to cut through the back still to free that copper line too. Be careful with this, as if it kinks and cracks, there is no fixing it (at a reasonable cost)


These threads have some pics of people doing something similar (first thread is probably the best)

https://www.homebrewtalk.com/forum/threads/antique-fridge-kegerator-build.300310/

https://www.homebrewtalk.com/forum/...g-chamber-build-by-a-not-so-handy-man.325763/

https://www.homebrewtalk.com/forum/...ed-fermentation-chamber-for-about-200.175456/
 
Well, guts are finally out. Thanks a heap, Kevin. Just looking for a place to put it, as I suck at cabinetmaking. I've seen "cabinet-bookshelves" in similar dimensions, with the exception of depth, so far only in the 13-18" or so range. Not sure what R value you have, but I was shooting for 2" R13. Not sure if that's overkill - that was based on a coolbot setup with 6K btu a/c. The R13 polyiso was their recommended insulation.
 
Good job Paul. :mug:

I used, and recommend, 2" rigid foam for the chamber. I want it to be as efficient as possible.

Also, with regards to cabinet making... dependent on where this is going to reside, you could just make the box out of the 2" rigid foam and some tape! Only tool necessary is a serrated blade to cut the foam!

Thanks Kevin. And, I'd like to take a moment to ensure I'd be immediately rubbed out should I even suggest putting the pink boards up here, lol. About 10' from our dining table. Though, it is worth considering how I'd try....

A question I meant to ask, Kevin or all. In the photo of the open cooling section, I see the freezer plate mounted on the top, and - is that just an enclosure I'm seeing inside the box on bottom, with whatever else they have going on?

DIY CABINET 2.jpg


Again, probably dumb - but with the dorm fridge coils and compressor and copper line all on the outside, and freezer plate inside - that's the only way I could do this one with a cabinet, right? Basically build a dorm fridge to dimensions I need - i.e., where are the evaporation coils in this, or is this a different means?
 
Paul, that little sub-enclosure under the freezer plate is where they have the compressor house and such; it is just like the "hump" that is at the bottom of dorm fridges. Building it like this (with an exhaust vent on the outside of the cabinet by the compressor to dissipate heat) is the only way to build your "custom spec dorm fridge" in a cabinet and have the cabinet look unmolested on the outside.
 
Paul, that little sub-enclosure under the freezer plate is where they have the compressor house and such; it is just like the "hump" that is at the bottom of dorm fridges. Building it like this (with an exhaust vent on the outside of the cabinet by the compressor to dissipate heat) is the only way to build your "custom spec dorm fridge" in a cabinet and have the cabinet look unmolested on the outside.

Thanks Kevin. Where do they mount the evaporator coils then?
 
Hard to tell in that pic... One idea is that you could mount them on the back of the cabinet where they would not be seen. Another way to tackle it would be to mount it inside the cabinet in the "sub-enclosure" along with the compressor. You could definitely need at least a vent of some sort to start (hvac registers work nicely). Monitor temps, and if getting too warm, then add a small computer fan in to the sub-enclosure to help move the heat out faster.
 
Hard to tell in that pic... One idea is that you could mount them on the back of the cabinet where they would not be seen. Another way to tackle it would be to mount it inside the cabinet in the "sub-enclosure" along with the compressor. You could definitely need at least a vent of some sort to start (hvac registers work nicely). Monitor temps, and if getting too warm, then add a small computer fan in to the sub-enclosure to help move the heat out faster.

Seems like the easiest thing to do if I want to mount the compressor inside, like the pic, would be to just emulate the dorm fridge - compressor inside in a sub-enclosure, vented; freezer plate as shown, and evaporator coil outside, mounted on the back, as you're saying. Right?

The other thing I realized is that my cabinet will have larger dimensions than the dorm fridge - so there will be a sort of drop down at the back to allow for mounting the plate, and then perhaps just do a compressor "bump" as any standard fridge so the compressor is outside, in a recess, and the coil mounted normally.
 
Back
Top