I built this chiller a few years ago, but I never posted here about it, so I thought it was about time to share!
This is a two stage counterflow chiller that I use with a pump from the kettle, and a pump for ice water. The main impetus, as most of the builds here have mentioned, was to save time chilling. This chiller is able to get 10 gallons of wort from boiling to 63F in about 15 minutes in one pass into the fermenter.
The reason for a two stage, rather than two separate chillers was for space and overall simplicity, as well as to reduce the total number of fittings. I built it into a Home Depot 5 gallon bucket, so it had a built-in handle, and was easy to store. The only thing I have to be careful of is draining. A typical counterflow chiller is much easier to fully drain, this design has the tubing going down then up, so I use my air compressor to blow out as much of the water as possible from inside the copper, as well as the chilling water outside the copper.
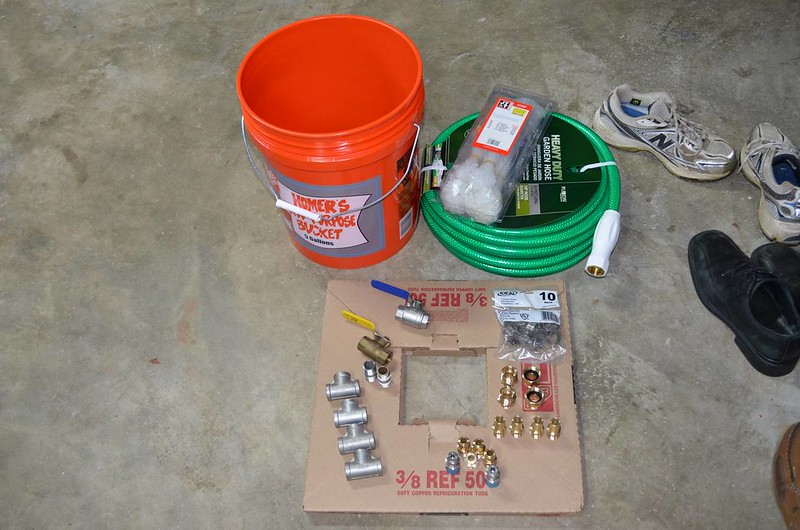
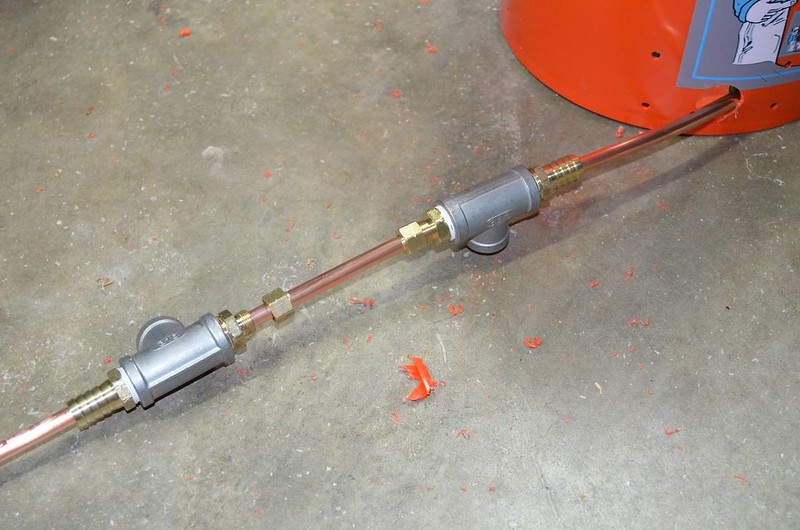
Overall supplies as shown in the first picture are: 50 ft of copper, T fittings, valves, compression fittings, threaded nipples, Swagelok fittings, garden hose, garden hose fittings, bucket, and zip ties. I personally use camlock fittings for all beerside transfers, and garden hose disconnects for all ground water.
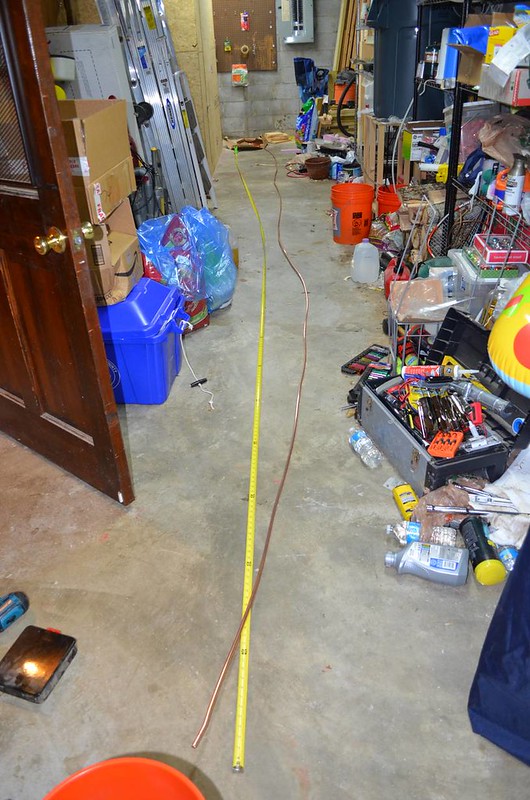
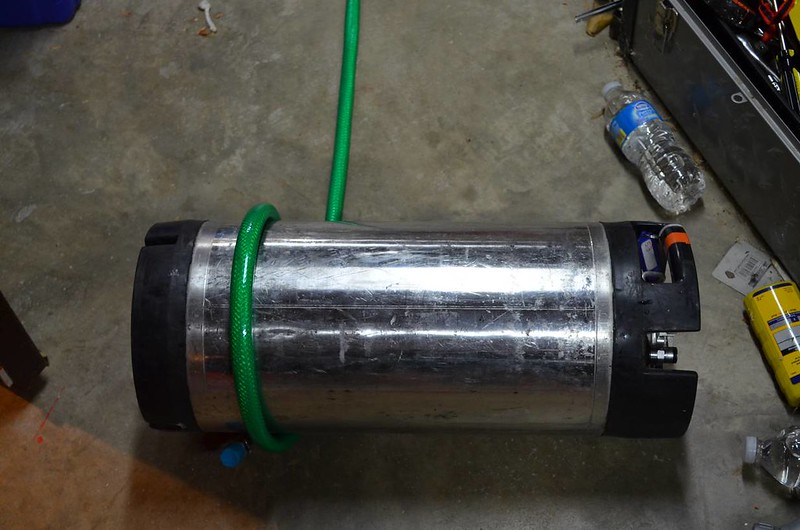
The first step was to roll out half of the coil, and push half of the garden hose on to it:
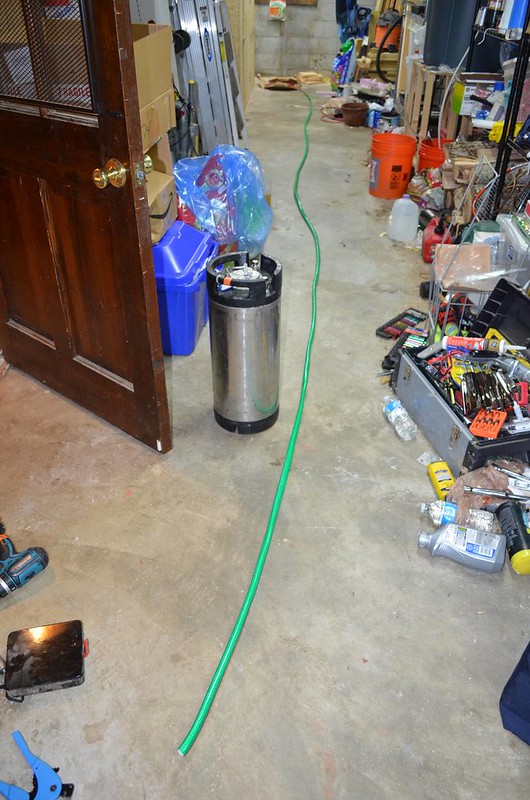
Then I used a keg as the inner form for the coil, and wrapped the first half of the coil around it:
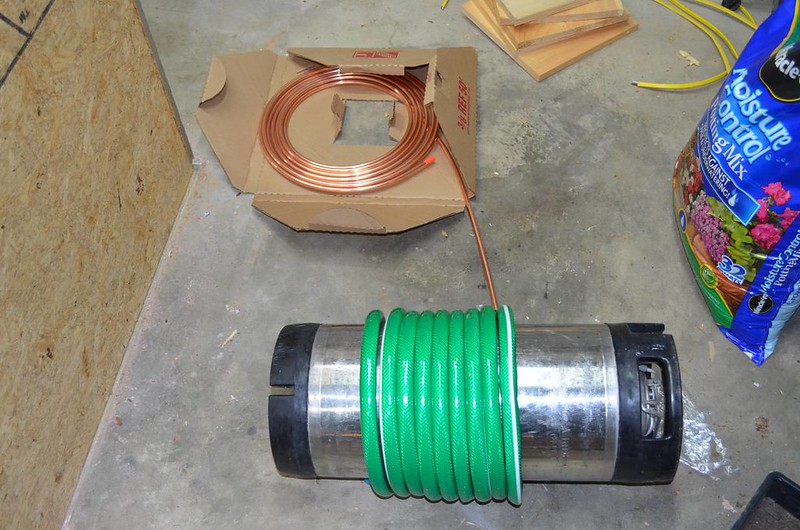
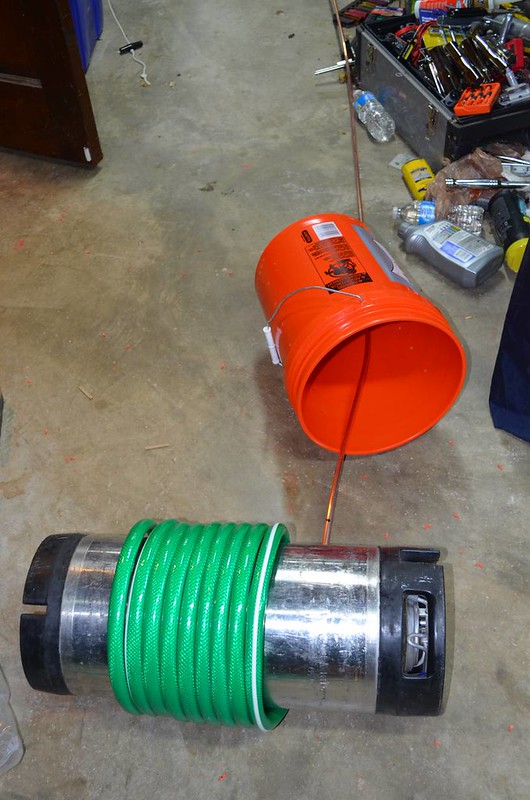
Then I drilled holes into the bucket: small holes for the zip ties to hold the chiller, and then a larger hole in the bottom to move from one stage to the next, and a hole at the top to extend the end:

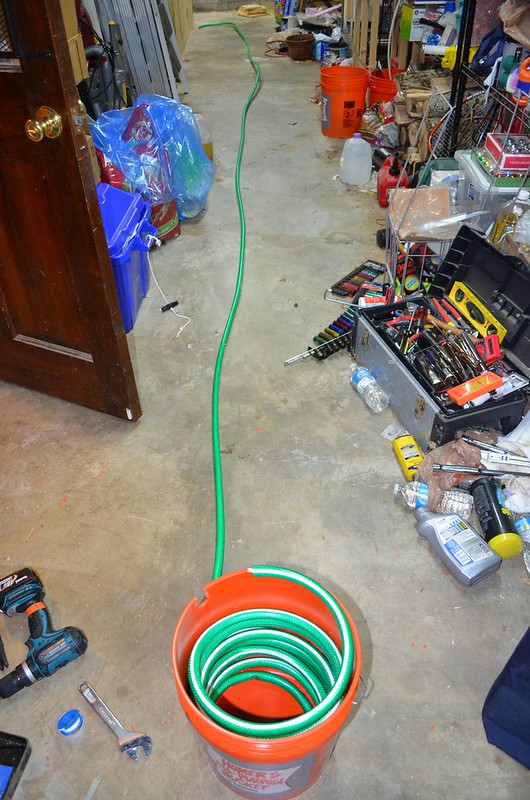
From there, I rolled out the last 25 ft, and then threaded the bucket onto the copper through the bottom hole:
After that, I removed the keg, and settled the first coil into the inside of the bucket (this will actually be the second stage of chilling):
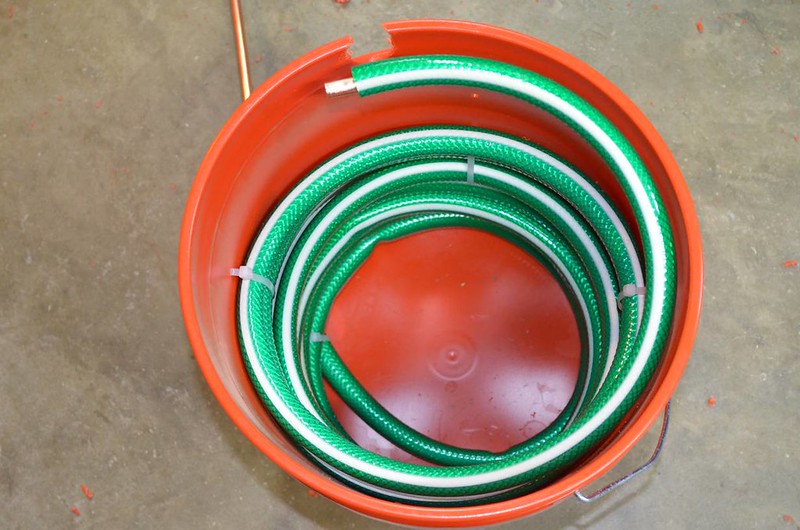
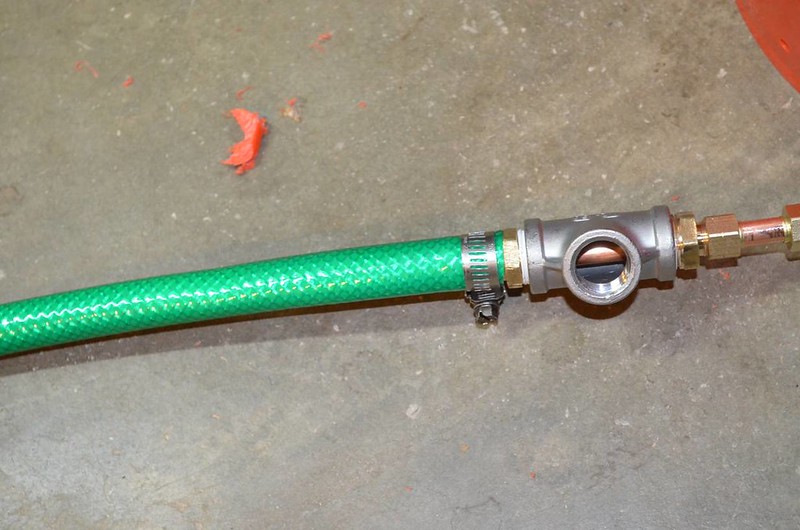
Once I did that, I needed to start adding the compression fittings and barbed fittings with the Tees, as well as push the last half of the garden hose onto the copper, and affix it with clamps:
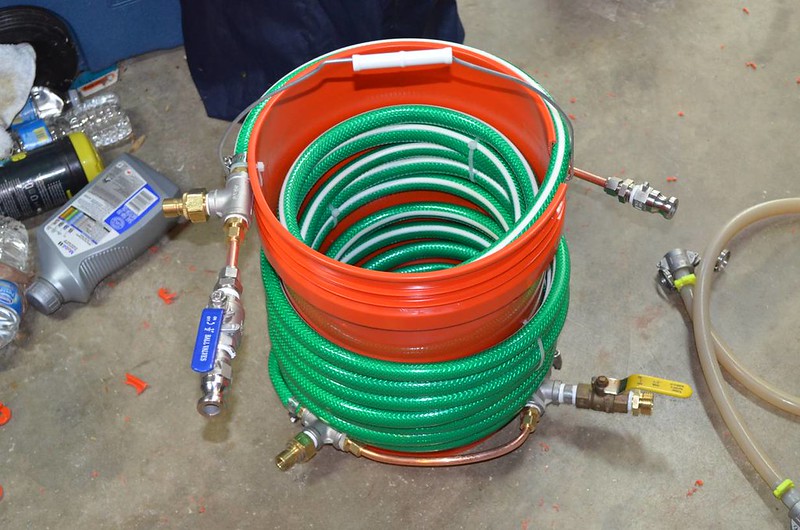
After that, it was time to do the outer coil, which would be the first stage:

After that, it was just adding the final fittings, valves, camlocks, and garden hose fittings for the end result:
I believe when I added everything up for things I had to buy, it was around $130, but I already had a lot on hand: stainless Tees, valves, camlocks, and garden hose fittings.
Since that last picture was taken, I have since added another stainless Tee at the outlet with a 1/4” compression fitting with two silicone orings for a temperature probe so that I can more easily measure the temperature going into the fermenter. I can post a picture of just that if anyone is interested (you can see it in the picture below of it in action).
I will say that you need a pump to get the wort through this chiller, as 50 ft of 3/8” copper provides a good amount of restriction, though even with that, I am able to get 10 gallons of wort through it in about 15 minutes at my pitching temperature for ales. If I were to do a lager, I would need to throttle the outflow, but for ales, I leave the exit valve completely open.
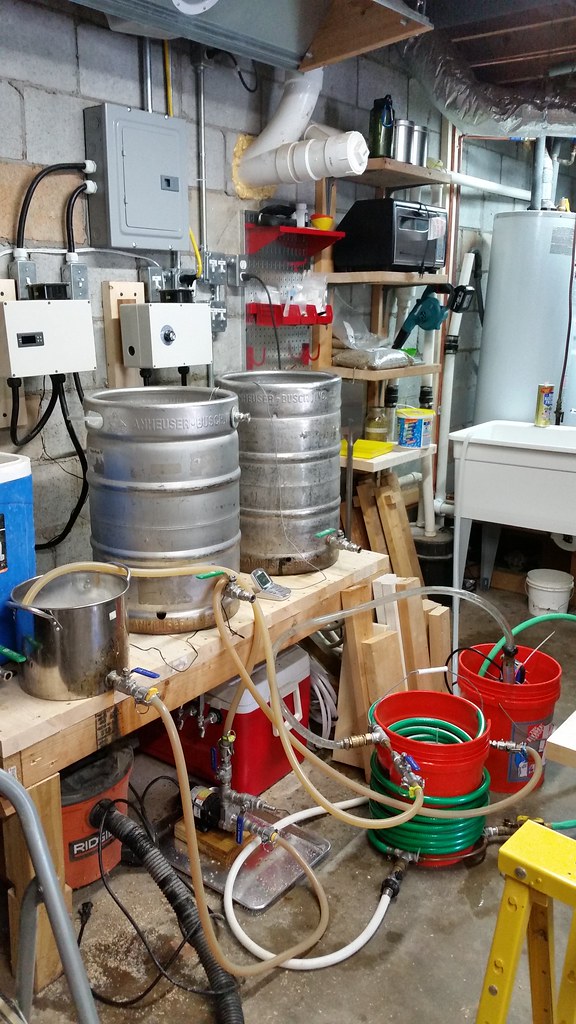
Here is a picture of it in action:
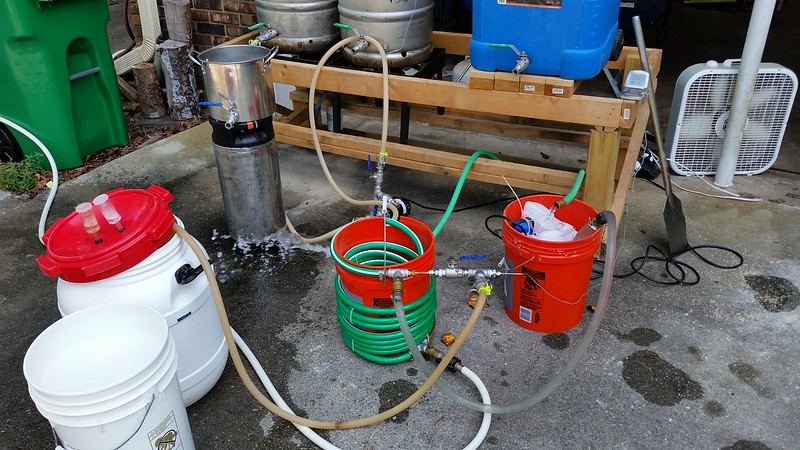
You can see the RV hose going in on the bottom, which circulates on the outside as the first stage of chilling. The Home depot bucket next to it is the submersible pump with ice water circulating in the inside coil which is the second stage. The wort is going from the boil kettle on upper left side, to the pump, from the pump the chiller, and then exits the chiller and into the fermenter (white bucket with red lid and airlocks).
It looks complicated, and takes a bit of time to set up, but chilling has become so much shorter that it is worth it for me. I also brew primarily ales, so I don’t worry about chilling for lagers.
If you look at the last picture, you will see a small pot with a ball vale on top of a keg. I fill that with star san, and I circulate that through the pump and chiller during the boil to sanitize the pump and chiller, then I hook up the pump inlet to the boil kettle, and I drain out the star san before filling the fermenter.
Let me know if you have any questions!
This is a two stage counterflow chiller that I use with a pump from the kettle, and a pump for ice water. The main impetus, as most of the builds here have mentioned, was to save time chilling. This chiller is able to get 10 gallons of wort from boiling to 63F in about 15 minutes in one pass into the fermenter.
The reason for a two stage, rather than two separate chillers was for space and overall simplicity, as well as to reduce the total number of fittings. I built it into a Home Depot 5 gallon bucket, so it had a built-in handle, and was easy to store. The only thing I have to be careful of is draining. A typical counterflow chiller is much easier to fully drain, this design has the tubing going down then up, so I use my air compressor to blow out as much of the water as possible from inside the copper, as well as the chilling water outside the copper.
Overall supplies as shown in the first picture are: 50 ft of copper, T fittings, valves, compression fittings, threaded nipples, Swagelok fittings, garden hose, garden hose fittings, bucket, and zip ties. I personally use camlock fittings for all beerside transfers, and garden hose disconnects for all ground water.
The first step was to roll out half of the coil, and push half of the garden hose on to it:
Then I used a keg as the inner form for the coil, and wrapped the first half of the coil around it:
Then I drilled holes into the bucket: small holes for the zip ties to hold the chiller, and then a larger hole in the bottom to move from one stage to the next, and a hole at the top to extend the end:
From there, I rolled out the last 25 ft, and then threaded the bucket onto the copper through the bottom hole:
After that, I removed the keg, and settled the first coil into the inside of the bucket (this will actually be the second stage of chilling):
Once I did that, I needed to start adding the compression fittings and barbed fittings with the Tees, as well as push the last half of the garden hose onto the copper, and affix it with clamps:
After that, it was time to do the outer coil, which would be the first stage:
After that, it was just adding the final fittings, valves, camlocks, and garden hose fittings for the end result:
I believe when I added everything up for things I had to buy, it was around $130, but I already had a lot on hand: stainless Tees, valves, camlocks, and garden hose fittings.
Since that last picture was taken, I have since added another stainless Tee at the outlet with a 1/4” compression fitting with two silicone orings for a temperature probe so that I can more easily measure the temperature going into the fermenter. I can post a picture of just that if anyone is interested (you can see it in the picture below of it in action).
I will say that you need a pump to get the wort through this chiller, as 50 ft of 3/8” copper provides a good amount of restriction, though even with that, I am able to get 10 gallons of wort through it in about 15 minutes at my pitching temperature for ales. If I were to do a lager, I would need to throttle the outflow, but for ales, I leave the exit valve completely open.
Here is a picture of it in action:
You can see the RV hose going in on the bottom, which circulates on the outside as the first stage of chilling. The Home depot bucket next to it is the submersible pump with ice water circulating in the inside coil which is the second stage. The wort is going from the boil kettle on upper left side, to the pump, from the pump the chiller, and then exits the chiller and into the fermenter (white bucket with red lid and airlocks).
It looks complicated, and takes a bit of time to set up, but chilling has become so much shorter that it is worth it for me. I also brew primarily ales, so I don’t worry about chilling for lagers.
If you look at the last picture, you will see a small pot with a ball vale on top of a keg. I fill that with star san, and I circulate that through the pump and chiller during the boil to sanitize the pump and chiller, then I hook up the pump inlet to the boil kettle, and I drain out the star san before filling the fermenter.
Let me know if you have any questions!